Pages

Sunday 27 November 2011

Leftovers

Here are two delicious, scrumptious Thanksgiving Day leftovers. Yes, we cooked a Thanksgiving dinner. No, we're not American. Yes, we had mac and cheese with ours. No, I don't feel silly.

Anyway, the night before I made a pumpkin cream pie and some pecan bars. I was cooking until very late at night but man was it worth it. Those pecan bars are delicious little salty and sweet bites that melt in the mouth. Okay, it took three of us to prise those little buggers out of the cake tin but once they were out I could tell it was worth every swear word. The pumpkin cream pie was good. I mean REALLY good. I've never had pumpkin in any form before and the only time I've encountered the smell and texture is when hollowing them out for Halloween, but this is definitely something I'd have again. Did I doubt this recipe at any point? No. It's from Pioneer Woman. Need I say more?

pecan bars on cookingwithacrochetspoon.blogspot.com

Pecan bars by EatLiveRun via Tasty Kitchen

pumpkin cream pie on cookingwitharochetspoon.blogspot.com

Pumpkin Cream Pie by the legendary Ree via Pioneer Woman

Thursday 24 November 2011

Happy Thanksgiving!

"I don't like Autumn.." - Bułeczka

Photograph by pyza* via flickr


I may not be American nor do I live in America but I would like to wish everyone a very happy thanksgiving. After all, no matter where we are, I think there are things that all of us are very thankful for.

Sunday 20 November 2011

Longing to get some much needed crochet time.

It hit me a week or so ago that I haven't crocheted in a long time. A very long time. I felt sad. I truly did. There are two things, among many, that I love to do. Cook. And crochet. Cooking is a necessity of course. I have to do it (nearly) every day. So I get to cook delicious things. More so at the weekends because I get more time to really put my thinking cap on and get elbow deep in sticky, messy ingredients and it doesn't matter if it takes me all day. I love it. Crocheting, however, isn't a necessity and I've found less and less time lately to sit and relax and hook away until my heart's content. I have many, many unfinished projects. For example, I have a green crocheted hat that is sitting in my stripey crochet bag just waiting for me to finish it and add the finishing touches so that it can brave the cold and keep my head warm this winter. I have an 'in progress' crochet starburst-sqaure blanket laying limply in my Cath Kidston knitting holdall. Just urging me to add more squares and make it into the beautiful, cosy blanket that I had originally planned. *Sigh*. I've come to the conclusion that I need to quit my job and spend my days crocheting, cooking and baking. Yes, I do. Hmm, a girl can dream can't she? In honour of my unfinished, crochet projects I will post about them soon. And more importantly, finish them. Or at least attempt to. I will. Scouts honour.

Tamatar Kuchumber (Tomato Salad)

tomato salad on cookingwithacrochetspoon.blogspot.com

Such a simple dish but this tomato salad is just AMAZING. Strangely enough, even though the name would lead you to believe it, this salad has no cucumber. So don't you go thinking that I've left any ingredients out now.

I'm a big fan of the Mexican salsa, in all of its varieties so I think that's why I love this so much. It's very similar, although the spices give it a real aromatic spin. I served this with spiced potato cakes and mint and yoghurt chutney. It would also be delicious with grilled chicken or tuna steaks. Make sure that you get the seasoning spot on. You don't want the salt or pepper to over power the spices. So, like me, you'll have to keep tasting it as you go along. Oh, what a shame.

To make it, you will need:

1lb of plum tomatoes (on the vine), deseeded and finely chopped
1 small red onion, finely chopped
2 tablespoons fresh coriander, finely chopped
1 tablespoon fresh mint, finely chopped
1 green chilli, deseeded and finely chopped
2 garlic cloves, crushed
1 tablespoon olive oil
1 lime, juice of
Sea salt and freshly ground black pepper, to taste
1/4 teaspoon cumin seeds
1/4 teaspoon mustard seeds

Heat a small frying pan over a medium heat and toast the cumin seeds for 1 minute until the seeds turn dark brown. Remove them from the heat and when they have cooled coarsely grind them using a pestle and mortar. Set these aside for later. Enjoying the aroma first.

Place the tomatoes in a large bowl along with the onion, fresh coriander, fresh mint, green chilli, garlic, seasoning and cumin seeds.

Heat the oil in a small frying pan and add the mustard seeds. Fry them until the seeds begin to pop. Be careful not to leave them too long or they start to pop out of the pan. Pour the seeds and the oil over the tomato salad. Gently combine all of the ingredients.

Squeeze the lime juice over the salad, cover and leave at room temperature until you are ready to serve. This will allow the flavours to develop.

Note to self: Be careful not to eat it all before serving it

Aam Ki Chutney (Mango Chutney)

mango chutney on cookingwithacrochetspoon.blogspot.com

500 grams of green mangoes, peeled and grated
2" piece of fresh ginger, grated
100 grams of granulated sugar
1/2 teaspoon of salt
1 teaspoon of malted vinegar
1 teaspoon ground mild chilli powder
1/2 teaspoon of ground garam masala

Place the mangoes, including their juices, into a saucepan along with the ginger over a medium heat and stirring occasionally reduce until the mixture begins to stick to the bottom of the pan. Don't worry, on this occasion, sticking is a good thing.

Add the sugar and stir frequently for 10 minutes or until the mango mixture begins to take on more of a jam-like consistency.

Add the salt and ground spices and combine well for another 2 minutes.

Stir in the malt vinegar. This will loosen the mixture slightly. Continue to stir for another 2 minutes.

Cool slightly, allowing the mixture to thicken even more. Serve warm with a main meal or a stack of warm poppadoms. Or pour into a sterilised jar and allow to cool completely before storing in the refrigerator. This delicious chutney will keep for up to 5 days.

Sunday 13 November 2011

He plays pee-po

I was going through some old photographs earlier and found this one that I had totally forgot about. Have you ever seen anyone more handsome?

He plays pee-po


photograph by me

Spicy corn relish

We made this over the weekend to serve on top of pan fried seabass and Mexican green rice. This taste combo is one of my absolute favourites right now. The freshness of the greens in the rice combined with the spice and sweetness in this relish is amazing and we never make anywhere near enough.

spicy corn relish on cookingwithacrochetspoon.blogspot.com

To make this spicy little number, you will need:

2 ears of fresh corn (which should give you approx. 1 and a half cups of kernels)
2 tbsps olive oil
2 shallots, finely chopped
1 clove garlic, minced
2 tsps minced ginger
2 jalapeno chillies (adjust depending on your heat tolerance), finely chopped
1/2 a red bell pepper, deseeded and cut into small pieces
1/2 a green bell pepper, deseeded and cut into small pieces
1 ripe tomato, peeled, seeded and diced
2 tbsps dark brown sugar, more to taste
2 tbsps cider vinegar
3 teaspoons of thai sweet chilli sauce
salt, to taste
pepper, to taste
3 tbsps coarsely grated dry-roasted peanuts
3 tbsps chopped fresh coriander

Start by removing the kernels from your corn. Heat the oil in a medium-sized pan and add the shallots, garlic, ginger and chillies. Cook over a medium heat until soft, approximately 5 minutes. Increase the heat to high and add the corn, red and green bell peppers and tomato. Cook for another 5-10 minutes until the corn and peppers release their juices and these juices start to evaporate.

Add the brown sugar, vinegar, sweet chilli sauce, salt and pepper and cook until the vegetables are tender and the relish has thickened and is richly flavoured. Stir in the peanuts and coriander and cook for another 2 minutes. This relish should be highly seasoned so at this point check that the seasoning is to your liking. Serve this relish hot or cold with almost any kind of seafood, poultry or meat. This relish will also keep for up to 5 days in the fridge in an air tight container.

Original recipe from Steve Raichlen's Barbecue! Sauces, Rubs & Marinades

Raspberry frangipane tarts

raspberry frangipane on cookingwithacrochetspoon.blogspot.com

To make these gorgeous, sticky, sweet, spongey little tarts, you will need:

100 grams of ground almonds
100 grams of softened butter
1 free range egg
90 grams of golden caster sugar
1 tbsp pure vanilla extract
1 orange
200 grams of raspberry jam
6 small shortcrust pastry cases
Icing sugar, for dusting
Clotted cream, to serve

Pre-heat your oven to gas mark 5. Crack the egg into a mixing bowl and add the almonds, butter and caster sugar. Grate in the zest of half the orange and add the vanilla extract. Using a spoon mix everything together until combined.

Next, lay out the pastry cases onto a baking tray. In each case spoon 1 teaspoon on jam, then 1 heaped teaspoon of the frangipane mixture, then another teaspoon of jam and another heaped teaspoon of the mixture. Spread the layers out a little as you go. Don't worry about being too neat. It's nice to let the jam ooze out through the frangipane when cooked.

Place the tray on the middle shelf in your oven and cook for 20 minutes. When ready the top of the tarts should be golden brown and oozing with a little of the jam. Serve warm with a large dollop of cream and a dusting of icing sugar.

Enjoy!

Pineapple caramel cheesecake

pineapple caramel cheesecake on cookingwithacrochetspoon.blogspot.com

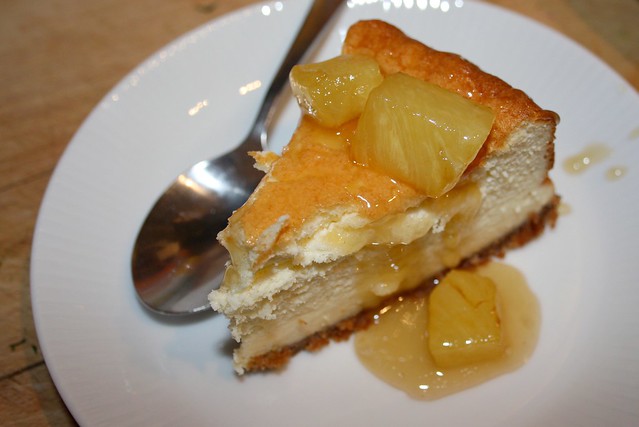
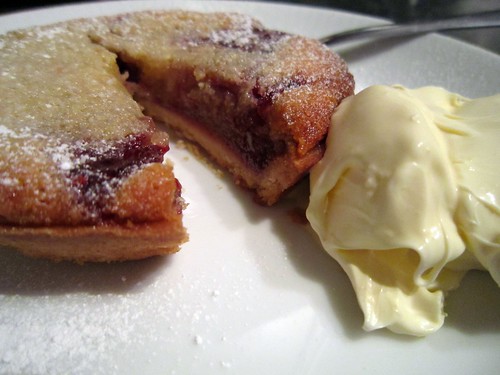
This cheesecake is delicious and creamy. Nothing like you've experienced with a store bought cheesecake. I recommend that you make this one. The pineapple caramel topping sauce is amazing and satifies the sweet tooth.

pineapple caramel cheesecake on cookingwithacrochetspoon.blogspot.com

You will need:

40 grams salted butter
140 grams of plain hob nob biscuits
225 grams of caster sugar
2 tbsps cornflour
750 grams of good quality cream cheese
6 large free range eggs, seperated
1/2 tsp pure vanilla extract
150ml double cream
150ml sour cream
pinch of sea salt
zest of 1 lime

For the pineapple caramel:

a large knob of salted butter
200 grams of fresh pineapple, cored and peeled and cut into small chunks
a pinch of sea salt
225 grams of caster sugar

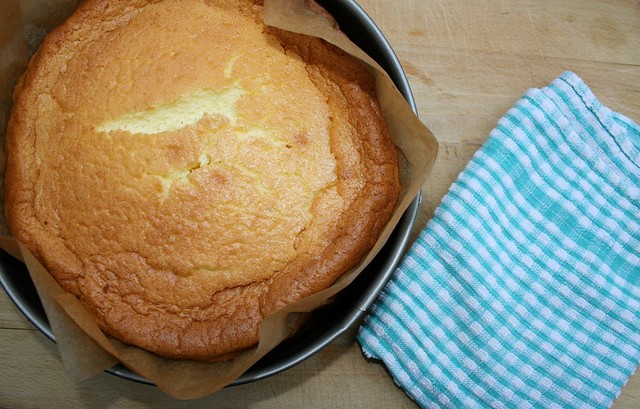
Preheat your oven to gas mark 2. Now go ahead and lightly grease a spring form cake tin with some butter and line the sides and base with baking paper.

To make the base, melt the butter and blitz the biscuits in the food processor. Mix these together until combined and then gently press the mixture evenly into the base of your cake tin. Now, if you want to put some of this mixture onto a spoon and place that in your mouth, go ahead, it's fine. Promise. Place your base in the fridge to chill for a while.

Now mix the sugar and cornflour together. Beat in the cream cheese, egg yolks and vanilla extract. Unless you have an arm like Popeye, you will need an electric whisk for this. Gradually add both the sour and double creams as you whisk. Add the salt and lime zest and mix to combine.

In a seperate bowl, whisk the egg whites until they are stiff and form peaks. Then with a large metal spoon fold them carefully into the cheese mixture. You want to keep this light and fluffy so fold very carefully. Pour the mixture on to your chilled base and place in the oven for 1 hour and 15 minutes until the cheesecake is lovely and golden on the top. Don't worry if your cheeecake cracks on top, this is the look we're after. Once the cake is cooked, turn off the oven and leave it there to cool completely. Then and only then, remove the tin and baking paper.

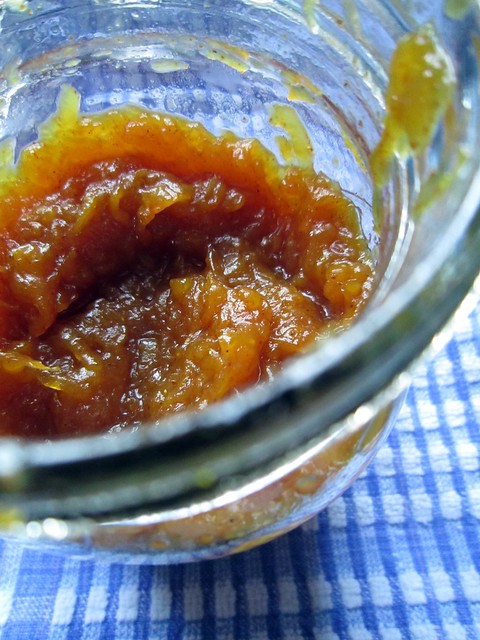
To make the caramel, melt the butter in a small, hot pan and fry the pineapple until golden. Season it with the salt and 1 teaspoon of the sugar as you go. Remove from the pan and add the rest of the sugar along with 100ml of water. When the sugar has completely dissolved, turn the heat right up so that the sugar bubbles and turns a deep, golden colour.

Turn the heat down and add another 140ml of water. Be careful that the caramel doesn't spit. Once the sugar has dissolved again, the syrup will start to thicken. Add the pineapple and pour a little over each serving of cheesecake.

Delicious.

Recipe adapted from Thomasin Miers' Mexican Food Made Simple

Monday 7 November 2011

Santa Pez

picplz_upload

Can you tell that I'm getting in the festive spirit?

Tuesday 1 November 2011

My Ultimate Festive Find

My! What are these?

Shiny Brites you say? Never. Yes...yes, they are.

I've wanted some Shiny Brites for a very long time now but could never justify the huge shipping costs to get them over to me here in the UK (where they aren't available *sob*). So, can you imagine my utter surprise and plain girlish excitement when I walk into a home store last Sunday and as I'm milling through the festive isles looking at all the glittery, shiny baubles I spot this packaging that I know so well? I tell you, I nearly knocked over every person in my way as I sprinted, yes sprinted, over to the shelf that these were on. I couldn't believe it, there in my hands I was actually holding boxes of Shiny Brites. Naturally, I had to buy them all. Didn't I? I did.
You may be asking 'What are Shiny Brites?'. I shall tell you. Shiny Brites are a popular American christmas decoration originally founded by Max Eckhardt just after the Great Depression, now reproduced by Christopher Radko. These lovely little decs are pure Christmas to me. Traditional and festive in every way. I shall be decorating my tree with these until I'm old and grey.

Tee hee.

A slightly belated Happy Halloween!

Pumpkin carving, decorating mantles, hanging bats, baking cakes, making Halloween garlands, dressing up, giving treats, Chinese takeaway and old Abbott & Costello movies. I hope everyone had a bewitching Halloween.